Showing posts with label Zowe. Show all posts

Wednesday, April 22, 2026

Moving Backward and Forward at the same time

Hey everyone! Long time.

I haven't posted anything here since my last post on November 21st last year. Life has been a bit busy,  balancing work and home, especially with the delightful chaos my 2-year-old twin boys bring into the picture. πŸ™‚

Over the last five months, I’ve constantly thought about writing my next blog post. I even created rough drafts on several topics, but somehow never found the time to complete them.

Last month, I visited the Chennai Pen Show and bought an acrylic fountain pen from Click Pens. 


The Acrylic Fountain Pen that I bought from Click Pens. The model name is Renaissance.

I came to a realization when I went back home and began writing with it. I already had a number of great fountain pens in my stationery drawer and bag, but I wasn't using them enough. 

So, I decided to change something.

Instead of typing the blog drafts directly on my laptop, I'll be writing them on my notebook using my fountain pens. 


And here is my first blog post following the new trend. 

Recently, I had the opportunity to write a COBOL DB2 program from scratch. As a Mainframe developer, this isn’t unusual. But the tools and the way I approached development this time were completely different.

About 99% of the code was written on VS Code using IBM Z Open Editor and Zowe Explorer.

Alongside the development process, I conversed with GitHub Copilot (mostly using Claude Opus 4.5 & 4.6 models) to better design the structure and flow of the program. 

It was a great experience compared to the traditional way of coding. You always have the AI assistant at your service, helping you structure logic, name your paragraphs, write loops, and handle repetitive tasks. You provide clear context, and the AI does a lot of the heavy lifting.

However, one thing became very clear to me:

AI is powerful, but not perfect without human oversight. Human involvement is still essential for effective collaboration.

For instance, when the initial cut of development was complete, I asked the AI assistant to perform a robust and comprehensive peer review. It highlighted several issues, which I fixed. Confident with the changes, I began staging the program in Endevor. To my surprise, the staging still failed due to several issues. 

One of them was related to MOVE statements.

In my initial version, I had the MOVE statements like the following:

MOVE GROUP-A.VAR-1 TO GROUP-B.VAR-1.

However, during compilation, these MOVE statements were flagged as errors.

What’s worth noting is that the initial version of these MOVE statements was suggested by the AI assistant. Although it captured the intent correctly, it overlooked COBOL-specific syntax requirements, which eventually caused compilation failures.

To fix this, I had to replace all such occurrences of the MOVE statement with dot notation to OF notation like below:

MOVE VAR-1 OF GROUP-A TO VAR-1 OF GROUP-B.

There were plenty of such occurrences that I instructed the AI assistant to replace all the MOVE statements with proper notation.

Based on my overall experience, I found that Claude models did a fairly better job when it came to generating COBOL code, especially when clear context was provided.

For instance, I had a requirement to perform a credit limit check for all customers within a group. The logic was simple in intent but required careful structuring. The program should proceed to the next step only if all customers in the group pass the check. If even one customer fails, the entire group should be skipped, and processing should continue with the next group.

When I described this to the model, it suggested an “all-or-nothing” approach and generated the corresponding COBOL logic. What stood out was that the solution was not just syntactically correct but also logically aligned with the requirement, and it worked as expected with minimal changes.

This experience showed me that AI is particularly effective when the problem is clearly defined.

That’s all for now. I’ll be back soon with another blog post and possibly a new series: “AI in My Daily Mainframe Life.”

As a closing thought, I recently added a cool little piece to my work desk, a 3D-printed z17 model that also doubles as a pen stand.

3D Printed z17 model Pen Stand

For the curious folks, I used the 3D design files that I found here 

Would love to hear what you think. Let me know in the comments.

Thanks for reading!


Tuesday, May 27, 2025

Modern Mainframe tools I use daily. Plus, a blog milestone!

A few days ago, I stumbled upon the Code4z Extension Pack for Visual Studio Code at my workplace. This bundle brings several modern tools to Mainframe developers right within VS Code. Here's what it includes:

✅ COBOL Control Flow
✅ COBOL Language Support
✅ Explorer for Endevor
✅ Zowe Explorer
⬜ Abend Analyzer for Mainframe
⬜ Data Editor for Mainframe
⬜ Debugger for Mainframe
⬜ HLASM Language Support

(I’ve highlighted the ones I’ve personally tried so far.)


Disclaimer:
The tools and setup showcased in this blog post were explored using my personal computer and a Mainframe ID obtained through the IBM Z Xplore learning platform. The content reflects my personal experimentation and learning and does not involve or represent any proprietary systems, data, or configurations from my workplace.

πŸ› ️ Getting Started with COBOL in VS Code

COBOL Control Flow and the COBOL Language Support extensions were immediately put into use. I had already created a custom REXX tool that extracts the COBOL source code from Endevor Element Listing output (one advantage of this source code is that all the INCLUDEs on the COBOL program are expanded) and sends it via email as a .txt file. I'd then open this .txt file in VS Code and manually set the language mode of the file to COBOL.

You can easily find out that the file is recognized as COBOL source code with the help of syntax coloring.

πŸ“· Click on the image to view it in full size.

A file with COBOL source code opened on VS Code. The language mode highlighted at the bottom right corner indicates COBOL. 


Right-clicking anywhere on the file presents you with a lot of useful options, my favorites being
  • Go to Definition
  • Find All References
  • Generate COBOL Control Flow
  • and, lately, Copilot.

COBOL Language Support features are shown upon right-clicking on the file. 

πŸ’‘ Real Productivity Boosters

When analyzing a COBOL program using CA Endevor’s listing output mode, I often find myself jumping up and down the listing—switching between paragraphs to trace the program's flow. In the process, it’s easy to lose track of the original paragraph I started from, especially when the logic branches out deeply. I’ve often resorted to using a notebook just to jot down the key paragraph names to avoid getting lost.

This is where modern tools shine. With features like Peek Definition and Peek References, you can stay on the current paragraph and quickly explore where a variable, copybook, or another paragraph is defined or referenced—without losing context.

Now, I use Visual Studio Code instead of 3270 Terminal for any kind of COBOL program analysis, whether I’m debugging abends, understanding functionality, or implementing enhancements.

πŸ”„ Visualizing Control Flow

Another useful feature is Generate COBOL Control Flow, which allows you to graphically visualize the COBOL program. 

πŸŽ₯ Watch: COBOL Control Flow in Action

This πŸ‘‡ video shows how the VS Code extension visualizes the control flow of a COBOL program, highlighting the entry point and relationships between paragraphs.

For me, the COBOL control flow helps answer questions such as

  • Where does the program begin execution? The flowchart clearly shows the entry point and how the control moves across different paragraphs or sections.
  • Are there any unreachable or unused paragraphs? If a paragraph exists but has no inbound flow, it may indicate dead or obsolete code.
  • How complex is the program?
  • Which paragraph calls which?  Instead of manually tracking PERFORM statements, you can visually trace the relationships between paragraphs.

Zowe Explorer & Endevor Integration

The next set of extensions that I configured were the Zowe Explorer and Explorer for Endevor. Though I've been using Zowe since 2020, this was the first time I tried my hand at it in a work setting. 

With the Explorer for Endevor extension, I was able to set up an Endevor synchronized workspace and retrieve elements on VS Code. This proved that the REXX tool to extract COBOL source code from listing output is futile. After all, why reinvent the wheel?

πŸ€– Using GitHub Copilot on the Mainframe

Thanks to GitHub Copilot access at work, my productivity has further improved. I use it along with Zowe Explorer for:

  • Writing/Debugging DFSORT

  • Resolving SQLCODE errors

  • Enhancing JCL scripts

  • and much more…

The use cases are endless. Here are some.

🧠 The Problem:

You wanted to create a DFSORT step that performs a transformation—like converting lowercase to uppercase—but weren’t sure about the syntax.

πŸ› ️ The Workflow:

  1. You started writing your JCL in VS Code.
  2. Invoked GitHub Copilot's In-line Chat with a natural-language prompt:
    • “Finish the OUTREC to convert lowercase letters to uppercase.”
  3. Copilot suggested:
    • OUTREC FIELDS=(1,80,TRAN=LTOU)
  4. You tested the job and confirmed the expected result. This step is essential as the code generated by Copilot may not always be correct.

πŸ“½️ Demo:

πŸ‘‡ Here's a short demo of me using GitHub Copilot to complete a DFSORT JCL step:

🧩 Final Thoughts

Modern Mainframe tooling, especially with extensions like Code4z, Zowe Explorer, and Explorer for Endevor, has revolutionized how I approach development and debugging. VS Code has now become my go-to tool nowadays. If you're still sticking to just the green screen, I highly recommend giving these tools a try. You’ll be surprised how much more productive and enjoyable Mainframe development can become!

I'm planning a follow-up blog post to dive deeper into how GitHub Copilot can be integrated with Zowe - bringing native-like AI assistance to mainframe development tasks. Stay tuned!

Over to you! Have you explored any modern tools for mainframe development? I'd love to hear about your experiences. Drop a comment below, and let's keep up the conversation.

πŸ… Featured Among the Top 30 Mainframe Blogs!

Before I wrap up this post, I’m thrilled to share a bit of good news. My blog has been ranked among the Top 30 Mainframe Blogs by Feedspot! πŸŽ‰

This recognition motivates me to continue sharing hands-on experiences from the Mainframe world. A big thank you to everyone who reads, shares, and engages with my content.


Sunday, October 10, 2021

All about IBM Z Xplore and getting through VSC1

Hi πŸ‘‹ Welcome to my blog. It's been quite some time since I have written anything over here. 

It's that time of the year again where we usually have an amazing contest opened up by IBM for students and working professionals. It's none other than  πŸ₯ Drum roll πŸ₯,

MASTER THE MAINFRAME

Few things are changed. Master the Mainframe is now, The IBM Z Xplore Learning Platform. 


The IBM Xplore learning experience is your place to upskill, reskill, and learn new skills as you begin your journey and explore IBM Z and enterprise computing. 

This experience is open to all, available year-round at no charge and includes:

  • IBM Z system access
  • Progressive learning paths
  • Hands-on challenges
  • Digital badging
  • Rewards
  • Leaderboard

What IBM has got to say about this new platform?


Signing up to IBM Z Xplore

To sign in to IBM Z Xplore, click πŸ‘‰ here. You'll be able to sign up either using Facebook, Twitter, LinkedIn or the email ID that you used for creating an IBMid.

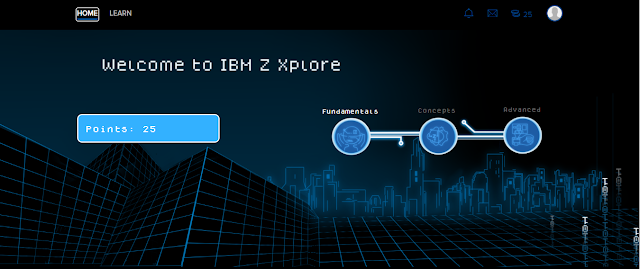
Once you're signed up, you will have to get through the first CHALLENGE, but hey! relax. It's like a walk in the park. You just need to answer some questions about yourself and you are done. Not just that - you get 25 brownie points for finishing the challenge and you'll also be taken to the home page of IBM Z Xplore 😎. I really love that Pixel font used in the site. 

Home page of IBM Z Xplore. 

There are 3 levels (viz. Fundamentals, Concepts & Advanced) shown at the home page and all you need to do is keep finishing challenges to climb up the ladder and move to the next level. The challenges will unlock one at a time, starting with VSC1 in the first level.


Getting started with VSC1 

Here is where you get your Z ID and Z Password to communicate directly with a Logical Partition (LPAR) on z15 Mainframe (I badly need an Emoji for a Mainframe machine). We will also use VS code to communicate with the z15 Mainframe.

In this challenge, you will,
  1. Download and install VS Code and node.js
  2. Login with your Z ID and set up the system
  3. Submit a file as your final "check"
Grab a copy of the Challenge Instructions PDF and follow the steps listed out there to download and install the necessary softwares to get yourself connected to the z15. 

Things would be pretty easy for those who took part in Master the Mainframe 2020 as you would most probably have the softwares already installed on your local system. If that's the case, you can directly jump to 5th step in the Challenge Instructions. Else, follow all the steps from beginning. 

We need to setup a profile in the Zowe Explorer extension with the given Z ID and Password. Zowe Explorer is what we'll be using to interact with mainframe datasets and jobs. 

IBM started letting the participants use Zowe Explorer extension on VS Code to establish connection πŸ”Œ with Mainframe, from last year (2020). In the MtM editions before 2020, we used Vista TN3270 terminal to establish connection with Mainframes. Zowe Explorer is a sub-project of Zowe, focusing on modernizing mainframe experience. Zowe is a project hosted by the Open Mainframe Project, a Linux Foundation project.
If you're at the tenth setup, Congrats πŸ‘

You're done with the setup. Steps 11 and 12 MUST be completed to finish this challenge. In short, you must locate a file residing in a PDS (imagine it as a folder πŸ“‚) and use Zowe Explorer to submit it. That's it! The submitted job will take care of the rest and finish this challenge for you. 

Let me guide you. 

Hover your mouse pointer to the profile that you created under Data Sets.

In the search bar that pops up, type ZXP.PUBLIC.JCL and hit Enter

Under your profile in Data Sets, you will now see ZXP.PUBLIC.JCL with a folder icon and a twistie (triangle) on the left. Click on the twistie to view the contents inside the folder.

Locate VSCJCL, right click on it and select "Submit Job". 

This is what it takes to submit a job in VS Code. Just some clicks and you're done 😎. 

After a few moments, when you go back to https://ibmzxplore.influitive.com, you should see that the VSC challenge has been marked COMPLETE! πŸ‘


You would've also unlocked 1 more challenge in this level. 

Update πŸ“’

Looks like IBM hasn't dumped the Master the Mainframe 2020 site and associated Z ID's. You can still access the last edition's challenges from the old site. In the Home page of IBM Z Xplore, navigate to the user profile button on the top right corner and click on it. You'll see 'Master the Mainframe' under Switch to group. 

While setting up the new profile for IBM Z Xplore in VS Code, I noticed that the mtm2020 profile was still accessible. It is therefore safe to assume that different LPAR's are being used by IBM for mtm2020 and zxplore.


That's all folks!

See you on my next blog post where I will be writing about the Files challenge in Fundamentals level. 


Sunday, April 25, 2021

Everything about IEFBR14 utility

It takes one full blog post to list out (almost) everything that can be done using a utility which is widely known as a program that does nothing. Ironic! πŸ˜€

Yup! I'm talking about IBM's IEFBR14 utility. 


Table of Contents πŸ“š

Use the links given below to navigate to various sections of this post.

Introduction 

When IEFBR14 is invoked, it branches to the address in Register 14, which returns back control to the operating system. The Assembler instruction to do this is BR 14. That's how this utility got the name as IEFBR14.

When IEFBR14 is called, it immediately returns back the control to the operating system with a completion code of 0. By returning the control to z/OS, IEFBR14 allows the system to process the disposition parameter on any DD statements that are specified along with the EXEC statement. We're simply exploiting this functionality of IEFBR14 for the creation and deletion of datasets. 

IEFBR14 was created because while DD statements can create or delete files easily, they cannot do so without a program to be run due to a certain peculiarity of the Job Management system, which always requires that the Initiator actually execute a program, even if that program is effectively a null statement. The program used in the JCL does not actually need to use the files to cause their creation or deletion — the DD DISP=... specification does all the work. Thus a very simple do-nothing program was needed to fill that role.
- Quoted text from Wikipedia.

Using IEFBR14 utility to create and delete datasets 


IEFBR14 is typically used for creating and deleting datasets. A sample JCL is shown below. 
 ****** ***************************** Top of Data ******************************  
 000001 //Z01071A JOB 1,NOTIFY=&SYSUID                       
 000002 //*                                     
 000003 //STEP1  EXEC PGM=IEFBR14                         
 000004 //DEL01  DD DSN=Z01071.PS.A,                       
 000005 //     DISP=(MOD,DELETE,DELETE),                    
 000006 //     SPACE=(CYL,(1,0),RLSE)                      
 000007 //NEW01  DD DSN=Z01071.PS.B,                       
 000008 //     DISP=(NEW,CATLG,DELETE),                     
 000009 //     SPACE=(CYL,(1,0),RLSE),                     
 000010 //     DCB=(LRECL=80,RECFM=FB,BLKSIZE=800)                                         
 ****** **************************** Bottom of Data ****************************  
IEFBR14 job step usually consists of an EXEC statement and DD statement for each dataset that we want to process.

As datasets are being referenced in each DD statement, a DISP parameter SHOULD be accompanied. 

Creation of datasets can also be done in foreground mode - 3.2 Data Set Utility panel - from ISPF. IEFBR14 utility is used when we want to create or delete the datasets as part of batch run.  

Creating a dataset using IEFBR14 utility


The JCL to create a new dataset using IEFBR14 utility is as follows: 
 ****** ***************************** Top of Data ******************************  
 000001 //Z01071A JOB 1,NOTIFY=&SYSUID                       
 000002 //*                                     
 000003 //STEP1  EXEC PGM=IEFBR14                         
 000004 //NEW01  DD DSN=Z01071.NEW.DATASET,                    
 000005 //     DISP=(NEW,CATLG,DELETE),                     
 000006 //     SPACE=(CYL,(1,0),RLSE),                     
 000007 //     DCB=(LRECL=80,RECFM=FB,BLKSIZE=800)                                          
 ****** **************************** Bottom of Data ****************************  

The DD statement named as NEW01 creates a new, empty dataset called Z01071.NEW.DATASET. All the information necessary to create the dataset has been provided in the JCL. 

DISP=(NEW,CATLG,DELETE) - creates a new dataset and catalogs it under normal termination. The dataset will be deleted if the job is terminated abnormally.

BLKSIZE of 800 is provided because the dataset created when providing BLKSIZE=0 may not be opened for view/edit as the system issues 'Invalid block size' message.

Click on the image for a larger version.

System issues 'Invalid block size' message when the dataset is created with BLKSIZE=0.

What happens when you try to create a dataset using IEFBR14 utility but without providing a DCB parameter in the DD statement πŸ€”?


The dataset gets created but it's not usable. Let's look at the dataset information.
 
Data Set Information shows the record format as ?, Record length and Block Size as 0.


Deleting a dataset using IEFBR14 utility


The JCL to delete an existing dataset before its creation is as follows: 

 ****** ***************************** Top of Data ******************************  
 000001 //Z01071A JOB 1,NOTIFY=&SYSUID                       
 000002 //*                                     
 000003 //STEP1  EXEC PGM=IEFBR14                         
 000004 //DEL01  DD DSN=Z01071.PS.A,                       
 000005 //     DISP=(MOD,DELETE,DELETE),                    
 000006 //     SPACE=(CYL,(1,0),RLSE)                      
 ****** **************************** Bottom of Data ****************************  

The DD statement named as DEL01 deletes an existing dataset. If the dataset doesn't exist, MOD disposition creates the dataset and deletes it. Hence, SPACE parameter is provided. 

πŸ’£The job will fail with JCL error if the DD statement has got a DISP=(MOD,DELETE,DELETE) without SPACE= parameter and the dataset doesn't exist. 

SPACE= parameter may not be necessary if you're trying to delete an already existing dataset with DISP=(MOD,DELETE,DELETE).

DISP=(OLD,DELETE,DELETE) without a SPACE= parameter can also be coded if you're pretty sure about the existence of a dataset before running the utility job to delete and re-create the dataset.

What happens when you provide a GDG base in IEFBR14 utility with DISP=(MOD,DELETE,DELETE) πŸ€”?

Let's try this out!

I've created a GDG base named Z01071.TEST.GDG with 3 generations.  


The JCL is as follows:

 ****** ***************************** Top of Data ******************************  
 000001 //Z01071A JOB 1,NOTIFY=&SYSUID                       
 000002 //*                                     
 000003 //STEP1  EXEC PGM=IEFBR14                         
 000004 //DEL01  DD DSN=Z01071.TEST.GDG,                     
 000005 //     DISP=(MOD,DELETE,DELETE)                     
 ****** **************************** Bottom of Data ****************************  

The JESYSMSG listing after the completion of the job is shown below.


Just the generations that are part of the GDG base gets deleted; not the GDG base itself. 

πŸ’‘ If you want to delete the GDG base in batch run, IDCAMS utility with DELETE command can be used. 

What happens when you provide a PDS member in IEFBR14 utility with DISP=(MOD,DELETE,DELETE) πŸ€”?

Let's experiment!

I've created a PDS named Z01071.TEST.PDS with 3 members in it. 


Let's try to delete the first member (MEMBER1) using the following JCL. 
 ****** ***************************** Top of Data ******************************  
 000001 //Z01071A JOB 1,NOTIFY=&SYSUID                       
 000002 //*                                     
 000003 //STEP1  EXEC PGM=IEFBR14                         
 000004 //UNCAT01 DD DSN=Z01071.TEST.PDS(MEMBER1),                 
 000005 //     DISP=(MOD,DELETE,DELETE)                     
 ****** **************************** Bottom of Data ****************************  

The results are pretty surprising. Thank god, I didn't store anything important in the test PDS πŸ˜€.


The entire PDS is deleted. 

Uncataloging a dataset using IEFBR14 utility

There is a difference between uncataloging a dataset and deleting a dataset. 

When a dataset is uncataloged, it's removed from the catalog so that if you search for the dataset from the Data Set List Utility (=3.4) just by providing the dataset's name, you will not be able to find the dataset. You should also provide the Volume Serial number the dataset is residing upon.
 
Whereas, if a dataset is deleted, it's removed from VTOC (Volume Table of Contents) and the dataset may not be retrieved.   

Remember that both SMS and non-SMS data sets can be created and deleted using IEFBR14 utility. Only non-SMS data sets can be cataloged and uncataloged.

Let's try to uncatalog a dataset using IEFBR14 and the JCL is as follows: 

 ****** ***************************** Top of Data ******************************  
 000001 //Z01071A JOB 1,NOTIFY=&SYSUID                       
 000002 //*                                     
 000003 //STEP1  EXEC PGM=IEFBR14                         
 000004 //UNCAT01 DD DSN=Z01071.INPUT.PS.A,                    
 000005 //     DISP=(OLD,UNCATLG)                        
 ****** **************************** Bottom of Data ****************************  
The JESYSMSG listing after the completion of the job is shown below.

Z01071.INPUT.PS.A dataset is uncataloged. 

Now that the dataset is uncataloged, let's try to search for the dataset just by providing the dataset's name. 
When we try to search for the dataset just by providing its name, No data set names found.

When we provide the Data set name as well as Volume Serial no., the dataset is listed. 


To catalog the dataset using IEFBR14 utility, the following JCL can be used. 
 ****** ***************************** Top of Data ******************************  
 000001 //Z01071A JOB 1,NOTIFY=&SYSUID                       
 000002 //*                                     
 000003 //STEP1  EXEC PGM=IEFBR14                         
 000004 //UNCAT01 DD DSN=Z01071.INPUT.PS.A,                    
 000005 //     DISP=(OLD,CATLG),                        
 000006 //     UNIT=3390,                            
 000007 //     VOL=SER=VPWRKB                          
 ****** **************************** Bottom of Data ****************************  
Note: The UNIT and VOL=SER= parameters must be provided to catalog a dataset.

Running an IEFBR14 JCL using Zowe CLI

Let's put everything (creating, deleting, cataloging and uncataloging) together in a JCL, store it as a local file (.txt file) in Desktop and try to invoke the local file using Zowe CLI (Command Line Interface).

Prerequisites:
  • Access to Zowe and z/OS MF (I've used the access obtained as part of Master the Mainframe 2020). 
  • Zowe CLI must be installed on the system (For additional Zowe CLI documentation, visit https://docs.zowe.org)
Let's create a text file with the following contents. 
 //Z01071A JOB 1,NOTIFY=&SYSUID        
 //*                      
 //STEP1  EXEC PGM=IEFBR14          
 //DEL01  DD DSN=Z01071.PS.A,         
 //     DISP=(MOD,DELETE,DELETE)      
 //UNCAT01 DD DSN=Z01071.INPUT.PS.A,      
 //     DISP=(OLD,UNCATLG)         
 //DEL02  DD DSN=Z01071.TEST.GDG,       
 //     DISP=(MOD,DELETE,DELETE)      
 //DEL03  DD DSN=Z01071.TEST.PDS(MEMBER1),  
 //     DISP=(MOD,DELETE,DELETE)   
The file is saved on my Desktop and it's named as IEFBR14.txt.
Zowe CLI is installed on your own computer, not on the mainframe. You'll use Zowe CLI to interface with Zowe and z/OSMF which is running on the mainframe. 


Steps to submit a JCL stored in a .txt file using Zowe CLI  are as follows: 

1. Open Command Prompt and type zowe. You'll get back a description, a listing of command groups, and options. 

Using the Zowe CLI. 

2. We have to use zos-jobs group to submit a JCL. Type zowe zos-jobs --help-examples  to view some examples. 

3. To submit a JCL from a local file, we should use the command, 

zowe zos-jobs submit local-file "IEFBR14.txt".

Upon the submission of the command, a status bar is shown submitting the local file to z/OS. 


Zowe CLI shows the JobID and the Jobname of the submitted job.

Let's use the JobID to locate the job from Zowe Explorer plug-in in VS Code. 

The JOBS Section on the left side bottom of the picture shows that the job with JobID as JOB04256 completed with return code 0. The JESYSMSG is opened on the right side using the Z Open Editor plug-in.  

Conclusion

Throughout this post, you have witnessed the uses of IEFBR14 utility. Most of the JCL's given in this post were commonly used on the sites that I've worked so far. If I had missed anything, please let me know through the Comments section below. Thx πŸ‘


Friday, February 26, 2021

How to sort on the bits of a byte using IBM DFSORT?

Recently, I came across a DFSORT coding challenge titled as "Odds & Evens".

The problem statement goes like this - Given a file with valid sequence numbers in columns 1 thru 6, sort the file so the corresponding output has all the even numbered records first, followed by all the odd numbered records.

I put on my thinking cap 🎩 for a while and came up with the following answer:

 ----+----1----+----2----+----3----+----4----+----5----+----6----+----7--  
 ***************************** Top of Data ******************************  
 //Z01071A JOB 1,NOTIFY=&SYSUID                       
 //STEP01  EXEC PGM=SORT                           
 //SORTIN  DD *                               
 000001                                   
 000002                                   
 000003                                   
 000004                                   
 000005                                   
 000006                                   
 000007                                   
 000008                                   
 000009                                   
 000010                                   
 000011                                   
 000012                                   
 000013                                   
 000014                                   
 000015                                   
 000016                                   
 000017                                   
 000018                                   
 000019                                   
 000020                                   
 //SORTOUT DD SYSOUT=*                            
 //SYSOUT  DD SYSOUT=*                            
 //SYSIN   DD *                               
   INREC IFTHEN=(WHEN=GROUP,RECORDS=2,PUSH(10:SEQ=1))            
   SORT FIELDS=(10,1,CH,D,1,6,CH,A)                     
   OUTREC FIELDS=(1,6)                            
 /*                                     
I just formed a group of 2 records and PUSH'ed sequence numbers (of 1 byte) for each record of the group. As there are only 2 records in a group, the sequence number will be 1 for the first record and 2 for the second record. The sequence number will be restarted from 1 when a new group is started. 

Then, I used the sequence number field (at col 10) in the SORT statement to sort it in the descending order so that all the records with sequence number as 2 will be at the top.  A secondary sort was applied on the first 6 bytes. 

Submitting this job, I got the following output,
  COMMAND INPUT ===>                                            SCROLL ===> CSR   
 ********************************* TOP OF DATA **********************************  
 000002                                       
 000004                                       
 000006                                       
 000008                                       
 000010                                       
 000012                                       
 000014                                       
 000016                                       
 000018                                       
 000020                                       
 000001                                       
 000003                                       
 000005                                       
 000007                                       
 000009                                       
 000011                                       
 000013                                       
 000015                                       
 000017                                       
 000019                                       
 ******************************** BOTTOM OF DATA ********************************  
WHEN=GROUP is one amazing feature in DFSORT, thanks to Frank Yaeger from IBM DFSORT Development team, as he is one of the brains behind the invention of WHEN=GROUP.

We got the answer. Are we done here?

Nope, I'm just done with the Intro. 

The main reason behind the idea of writing this blog post was that when I was looking at other answers, I stumbled upon a solution which had a syntax that I've never seen before. It goes like this: 
SORT FIELDS=(6.7,0.1,BI,A),EQUALS
Most of us would use the SORT control statement to specify the control field based on which the sorting should take place. We provide,
  1. the position of the field within the record
  2. the length of the field (in bytes)
  3. the format of the data in control field
  4. the order in which field must be sorted (ascending or descending)
Let's take the first 2 items. The position of the field within the record is the byte positon relative to the beginning of the record. The length of the field is usually expressed in integer numbers of bytes. We deal with Bytes (and a pet lover has to deal with bites 🐢 sometimes).

Let's take a look under the hood πŸ”§


A byte consists of 2 nibbles and each nibble is 4 bits long. A bit is either 0 or 1.

IBM Mainframe uses the EBCDIC character encoding. Each character is represented by its 8 bit EBCDIC Code. When we turn on the Hex mode, we will be able to see an hex value for each byte. When the hex value of each byte is converted to binary, we'll get the corresponding bits. 

For example, 

SRINI becomes,
E2        D9        C9        D5        C9                  Hexadecimal
11100010  11011001  11001001  11010101  11001001    Binary

πŸ“£IBM DFSORT allows us to sort on the bits of a byte with "bytes.bits" notation. 

How to sort on the bits of a byte?

Now, we know that each character has got an 8 bit binary value, we can use the bytes.bits notation to sort using bits.
  • First, specify the byte location relative to the beginning of the record and follow it with a period.
  • Then, specify the bit location relative to the beginning of that byte. Remember that the first (high-order) bit of a byte is bit 0 (not bit 1); the remaining bits are numbered 1 through 7.
In SORT FIELDS=(6.7,0.1,BI,A),EQUALS statement,
6.7 - says that the starting postion is the last bit in byte 6. 
0.1 - says that the length is 1 bit. 
BI  - for Binary format as we want to sort on bits
A  - for Ascending order. 

But why 6.7 as the start position of the control field? 

That's because by looking at the 6th byte of every sequence number, we can say whether that's an even number or odd number.

Example:
000001 - πŸ‘€ -> that's an odd number
000002 - πŸ‘€ -> that's an even
000003 - πŸ‘€ -> that's an odd
000004 - πŸ‘€ -> that's an even
000005 - πŸ‘€ -> that's an odd
000006 - πŸ‘€ -> that's an even. I'm tiredπŸ˜‘
....
....
.... and so on.

Another significance is that for each even number, the Least significant bit (the last bit) is 0 and for each odd number, it's 1. 

Example:
1         EBCDIC character
F1        Hexadecimal  
11110001  Binary

2         EBCDIC character
F2        Hexadecimal
11110010  Binary

3         EBCDIC character   
F3        Hexadecimal
11110011  Binary

4         EBCDIC character
F4        Hexadecimal
11110100  Binary

Hence, if we sort the last bit of 6th byte in ascending order, we would get all the even numbered records first, followed by the odd numbered records. 

The EQUALS parameter is coded in the SORT statement to preserve the original sequene in the output. If EQUALS is not coded, then the output will have all the even numbered records first, followed by the odd numbered record but the even/odd numbered records will not be in sorted order.

Let's try running this SORT operation using Python 🐍


We can make use of the Python API's provided by ZOAU to run the SORT operation. Z Open Automation Utilities (abbreviated to ZOAU) lets you perform many tasks on z/OS without needing to get into JCL. IBM has developed a bridge between Python and z/OS by creating API's for Python which allow Pythonistas to access z/OS resources. 

Before we start, we need the following stuff to run the SORT operation from Python:
  1. VS Code with Zowe explorer and IBM Z Open Editor extensions.
  2. Access to Zowe explorer.
  3. Access to USS (Unix System Services). 
  4. Little bit of Python Skills.
Note: Access to Zowe explorer and USS can be obtained when you sign up for MTM2020.

First, we need to create a new file under your home directory (/z/zxxxxx) in Unix Sytem Services. Use the touch command to create a new file.

I created one using this command, touch run_sort.py. Then, I used the IBM Z Open Editor to write the following code inside this file.

 
I've used Trinket to embed the Python code in this blog post. Note that you may not be able to RUN πŸƒ this script as the ZOAU utilities for Python aren't available in Trinket.

Let's walk through the code.

Lines 1 thru 3: The required ZOAU libraries for Python are imported so that you can use them in your code. 

Lines 5 thru 9: Line #5 uses the os.getenv() method in Python with 'USER' as argument. As the operating system that Python is running under is z/OS, USERID variable is assigned with your TSO user ID. 
Lines 6 thru 9 has got 3 variables of string type to store the dataset names. 

Lines 11 thru 28: Lines 11 thru 28 mimics the functionality of IEFBR14 utility. These lines delete the datasets before creation. We make use of the zoautil_py.Datasets module which has got several dataset related functions like create, delete, exists and so on. 

Lines 30 thru 41: Writes data into the SORTIN and SYSIN datasets. 
Line #31 defines an empty list called num.This list is created to store the sequence numbers from 1 to 20. Read more about lists and how to access the elements in a list πŸ‘‰ here
Lines 34 and 35 creates sequence numbers from 1 to 20 with the help of for loop and range() function in Python. zfill() method is used to populate leading zeros. As zfill() method can be applied only on string data, the numbers are type converted to string using str() function (in line #35). All the sequence numbers are appended to the list, num. The list is then written to the SORTIN dataset.
Lines 40 and 41 writes the SORT statements to the SYSIN dataset. The write functionality is achieved via zoautil_py.Datasets module.

Lines 43 thru 53: Line 44 creates an empty list called dd_names to store the DD names that are needed for the SORT program to run. 
In Line 53, MVSCmd.execute API is called to run the program SORT with arguments MSGPRT=CRITICAL,LIST (which goes to the PARM parameter in EXEC statement) and the list of DDStatements created in lines 47 thru 50. When this instruction is executed, a job might be submitted on z/OS in the background. 

Line #55 checks the return code from MVSCmd.execute API call. If it's zero, a message is displayed in the terminal and the output dataset (SORTOUT) created from the previous execution is read. 

When the program is run with python3 run_sort.py command in terminal, we get the following output.

Note: Click on the picture to get an enlarged view. 

The records in the output dataset are displayed in the terminal after running the Python code. The even numbered records are at the top, followed by the odd numbered records.

The datasets that were created from Python can also be accessed from the terminal. The datasets are shown below:

The input dataset to the SORT program. The sequence numbers were generated in Python.


The SYSIN input to the SORT program. The SORT statements were written from Python.


The output dataset. 

We have reached the bottom of this post and we discussed about two things:
  1. How to sort on the bits of a byte using IBM DFSORT?
  2. How to perform DFSORT operation using Python? 
I hope the content in this post was helpful to you. Please post your questions/suggestions in the Comments section of this post. 

Thx and Happy Weekend!