Showing posts with label IBM Mainframe. Show all posts

Thursday, September 18, 2025

Why SRCHFOR didn’t find my string (and how I fixed it)

 Not long ago, I was trying to search for a string inside a PDS using the SRCHFOR command. To my surprise, the command returned the message:String(s) not found

Invoking the SRCHFOR command with the search string

String(s) not found

But I knew for sure that the member contained the exact string!

Here is the member in PDS with the exact string that we are searching for.

This reminded me of a post I had read about two years ago where someone faced the same issue. At that time, I noted it as an interesting quirk of ISPF. Now that I’ve stumbled upon it again, I thought I’d document the problem, the solutions I explored, and how I eventually rediscovered that original tip.

The problem: SRCHFOR and case sensitivity

The root cause is simple: SRCHFOR automatically converts the search string to uppercase after you press Enter.

So if your dataset member has mixed-case text (e.g., HelloWorld) and you try:

SRCHFOR 'HelloWorld'

it silently changes it to:

SRCHFOR 'HELLOWORLD'

…and of course, the match fails.

Step 1: Checking the documentation

To be sure I wasn’t missing something, I pulled out the z/OS ISPF User Guide. I even uploaded the manual to NotebookLM and asked how to prevent SRCHFOR from changing the case of my search string.

NotebookLM suggested two options:

    1. Use ISPF 3.15 (Extended Search-For)

  • This option provides an ASIS field.
  • When you specify ASIS=YES, the search is performed without converting the string to uppercase.
  • This worked perfectly.

Type the search string in the Asis field. As you see, multiple search strings can be searched in one go. 


String(s) found. Yeahh!

    2. Use the SFE Command

  • SFE is a panel-driven version of SRCHFOR.
  • You can invoke it directly against a PDS and provide the search key.
  • This also respected the case and gave correct results.
Type 'SFE' in the line command area against the PDS.

Type the search string. Put a '/' on the Any case process option at the bottom left to select it. 

String(s) found.

Both solutions worked, but I still felt there must be a simpler way.

Step 2: Rediscovering the Reddit Tip

While searching online, I found the exact Reddit post I had read two years ago. The OP there had shared a neat trick:

  • Invoke SRCHFOR without parameters:

    SRCHFOR
  • This opens up the Search-For Options panel.

  • From there, select the “Any case” process option.

Once you do this, SRCHFOR will no longer force your search string to uppercase. Problem solved!

(Credit to the Redditor who originally shared this tip)

Invoke SRCHFOR from the command line without passing a search string.

In the SRCHFOR options displayed, put a '/' on the Any case process option at the bottom left.

Try searching for the string (with lowercase) again

String(s) found.

Three Ways to Solve the Problem

Here’s a quick summary of the methods I tested:

  1. ISPF 3.15 (Extended Search-For) with ASIS

    • Best for detailed searches with lots of parameters.

  2. SFE Command

    • Quick, panel-based, and respects the case.

  3. SRCHFOR (no parameters) → Select “Any case”

    • Simple, and once set, it keeps SRCHFOR from changing your string.

Bonus: SRCHFOR vs. SRCHFORE

While digging around, I also refreshed my memory on the difference between the two commands:

  • SRCHFOR → Searches within a single dataset (PDS or sequential).

  • SRCHFORE → The extended version, which lets you search across multiple datasets or a dataset list.

So if you often search across a group of libraries, SRCHFORE is your friend.

Wrap-Up

This little exercise was a reminder that even tools we’ve used for years can have hidden quirks. SRCHFOR changing case silently tripped me up, but now I know at least three ways around it.

If you ever find SRCHFOR telling you “No strings found” when you’re sure otherwise, try one of these fixes. And a big thanks to that Redditor from two years ago—your tip still saves the day!


Tuesday, October 12, 2021

IBM Z Xplore - Getting through Files Challenge in Fundamentals level

Hello 👋,

In this post, I'll guide you through the second challenge, Files, in the Fundamentals level.


If you're new here, I would recommend you to check my previous post on IBM Z Xplore and getting thru the first challenge (VSC1) in the Fundamentals level, 👉 here


Let's get started 

From the home page of IBM Z Xplore, you just need to click on that tile that say Files.

Now, you'll have to watch a video which runs for 2 minutes. This will help you demystify what the equivalents of files 🖹 and folders 📁are known as, in IBM Z systems. 

Data Sets and Members

In a Windows system, you've got Files and Folders. Likewise, in IBM Z, they are Data sets and PDS (Partitioned Data Set) respectively. 

        Files (in Windows)          =     Data sets (in IBM Z)
Folders (in Windows)     =     PDS (in IBM Z)

A file in Windows system can either be inside a Folder or outside, but it's still called as file. In IBM Z, if a file (actually, Data set) is inside a PDS, it's a Member. If the file is not inside a PDS, it's a Sequential Data set.

Inside the Files in Windows system, you've got Lines. Inside a Sequential Data set and member(s) of PDS, you've got Records.

Keep it Simple: A Sequential Data Set store records sequentially one after the another. It is useful where all the data needs to be referenced in the order that it was stored, such as a log or report. 
A Partitioned Data Set stores data in individual members. An example of the type of data stored in a PDS would be Program Load Modules or JCL Batch jobs.
z/OS works with a number of different types of Data Sets though but they're all out of scope for now. 
 
The way you name a Data Set or PDS is quite different in IBM Z as there are some rules:  
  • A data set name consists of one or more parts connected by periods. Each part is called a qualifier.
  • Each qualifier must be 1 to 8 characters in length.
  • Each qualifier must begin with an alphabetic character (A to Z) or the special character @, #, or $.
  • The remaining characters in each qualifier can be alphabetic, special, or numeric (0 to 9) characters.
  • The maximum length of a complete data set name before specifying a member name is 44 characters, including the periods.
Some examples for valid Data Set names are,
INPUT.FILE.#1
OUTPUT.FILE.#1
S

You're all caught up! 

After watching the 2 minute video 📹, you'll have to take up a quiz which contain 3 questions. You'll get 3 brownie points if you answer all the 3 questions correctly. 

I'm gonna put the questions here but without the answers. Give it a go.  

Question 1: What are the two types of data sets we learned about so far?
Question 2: Which of the following can go inside a Partitioned Data Set, and can contain Records?
Question 3: Which data set do you have full read & write access to? (Hint: Your own data sets)

The Challenge 💪

Grab a copy of  the challenge instructions PDF.  Fire up the VS Code application in your PC and get into the Zowe Explorer extension. 

First thing that you have to do as part of this challenge is to have the data sets and members, that you'll use for this challenge, created from ZXP.PUBLIC.JCL (a read-only PDS) to your personal PDS, ZXXXXX.INPUT.  (Please make sure to enter your Z ID, not ZXXXXX).

Now, go through each and every member in your personal PDS (ZXXXXX.INPUT) for one of them will contain text directing you to rename it and the name you should rename it to. Follow the instructions in the PDF carefully to rename the member. 

Tip 💡: Don't miss to read the blue boxes (usually at the bottom of each page) in the Challenge Instructions PDF. 

After renaming the member, continue going through other members for one of them will direct you to delete it . Just right click on that member and choose "Delete". Poof! 💨 It should've been gone. 

Done with the renaming and deletion? 

Alright. Get into a different PDS named as ZXXXXX.SURPRISE. It will have only one member in it. You need to copy that member to your personal PDS (ZXXXXX.INPUT). How? The instructions in the PDF has it all. It's just a matter of few clicks on your mouse and you'll be done. 

Roger, Copy that?

Now, you should be looking for a Sequential Data set named as ZXXXXX.SEQDS. 

You'll usually view the contents of the members and data sets on the right side, on a editor which is called as Z Open Editor. It's an extension in VS Code and it allows you to view, edit and save z/OS data sets. 

Use the Z Open Editor to view the contents of the Sequential Data set and add a new line at the bottom (after the line starting with 'Visit') and enter some text. The text can be anything as long as it's appropriate. 


 You may then press Ctrl + S to save the dataset. 

Lastly, you've to make your own member in your personal PDS. To do that, just right click on your personal PDS, ZXXXXX.INPUT and choose 'Create New Member'. When prompted for a name, type MYNEWMEM as the name and hit Enter. You'll be done. 

Finish line 🏁

Now, you've got to record your victory🥇. In ZXP.PUBLIC.JCL PDS, look for FILES1 member, right click on it and select “Submit Job” to hand in your work. 

Then go back to IBM Z Xplore and Open the Files challenge. Go to the bottom of the page and hit on "CHALLENGE COMPLETE, CHECK MY JCL SUBMISSION". When you come out of the page, you should've unlocked new challenges.  

I hope that by now, you would've got acquanited with the PDS, members, data sets and records. In the next post, we'll look into JCL1 challenge in Fundamentals level.  


Sunday, October 10, 2021

All about IBM Z Xplore and getting through VSC1

Hi 👋 Welcome to my blog. It's been quite some time since I have written anything over here. 

It's that time of the year again where we usually have an amazing contest opened up by IBM for students and working professionals. It's none other than  🥁 Drum roll 🥁,

MASTER THE MAINFRAME

Few things are changed. Master the Mainframe is now, The IBM Z Xplore Learning Platform. 


The IBM Xplore learning experience is your place to upskill, reskill, and learn new skills as you begin your journey and explore IBM Z and enterprise computing. 

This experience is open to all, available year-round at no charge and includes:

  • IBM Z system access
  • Progressive learning paths
  • Hands-on challenges
  • Digital badging
  • Rewards
  • Leaderboard

What IBM has got to say about this new platform?


Signing up to IBM Z Xplore

To sign in to IBM Z Xplore, click 👉 here. You'll be able to sign up either using Facebook, Twitter, LinkedIn or the email ID that you used for creating an IBMid.

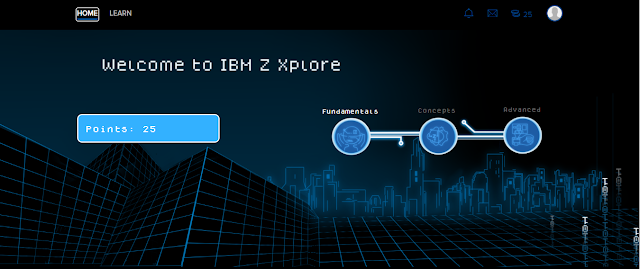
Once you're signed up, you will have to get through the first CHALLENGE, but hey! relax. It's like a walk in the park. You just need to answer some questions about yourself and you are done. Not just that - you get 25 brownie points for finishing the challenge and you'll also be taken to the home page of IBM Z Xplore 😎. I really love that Pixel font used in the site. 

Home page of IBM Z Xplore. 

There are 3 levels (viz. Fundamentals, Concepts & Advanced) shown at the home page and all you need to do is keep finishing challenges to climb up the ladder and move to the next level. The challenges will unlock one at a time, starting with VSC1 in the first level.


Getting started with VSC1 

Here is where you get your Z ID and Z Password to communicate directly with a Logical Partition (LPAR) on z15 Mainframe (I badly need an Emoji for a Mainframe machine). We will also use VS code to communicate with the z15 Mainframe.

In this challenge, you will,
  1. Download and install VS Code and node.js
  2. Login with your Z ID and set up the system
  3. Submit a file as your final "check"
Grab a copy of the Challenge Instructions PDF and follow the steps listed out there to download and install the necessary softwares to get yourself connected to the z15. 

Things would be pretty easy for those who took part in Master the Mainframe 2020 as you would most probably have the softwares already installed on your local system. If that's the case, you can directly jump to 5th step in the Challenge Instructions. Else, follow all the steps from beginning. 

We need to setup a profile in the Zowe Explorer extension with the given Z ID and Password. Zowe Explorer is what we'll be using to interact with mainframe datasets and jobs. 

IBM started letting the participants use Zowe Explorer extension on VS Code to establish connection 🔌 with Mainframe, from last year (2020). In the MtM editions before 2020, we used Vista TN3270 terminal to establish connection with Mainframes. Zowe Explorer is a sub-project of Zowe, focusing on modernizing mainframe experience. Zowe is a project hosted by the Open Mainframe Project, a Linux Foundation project.
If you're at the tenth setup, Congrats 👏

You're done with the setup. Steps 11 and 12 MUST be completed to finish this challenge. In short, you must locate a file residing in a PDS (imagine it as a folder 📂) and use Zowe Explorer to submit it. That's it! The submitted job will take care of the rest and finish this challenge for you. 

Let me guide you. 

Hover your mouse pointer to the profile that you created under Data Sets.

In the search bar that pops up, type ZXP.PUBLIC.JCL and hit Enter

Under your profile in Data Sets, you will now see ZXP.PUBLIC.JCL with a folder icon and a twistie (triangle) on the left. Click on the twistie to view the contents inside the folder.

Locate VSCJCL, right click on it and select "Submit Job". 

This is what it takes to submit a job in VS Code. Just some clicks and you're done 😎. 

After a few moments, when you go back to https://ibmzxplore.influitive.com, you should see that the VSC challenge has been marked COMPLETE! 👏


You would've also unlocked 1 more challenge in this level. 

Update 📢

Looks like IBM hasn't dumped the Master the Mainframe 2020 site and associated Z ID's. You can still access the last edition's challenges from the old site. In the Home page of IBM Z Xplore, navigate to the user profile button on the top right corner and click on it. You'll see 'Master the Mainframe' under Switch to group. 

While setting up the new profile for IBM Z Xplore in VS Code, I noticed that the mtm2020 profile was still accessible. It is therefore safe to assume that different LPAR's are being used by IBM for mtm2020 and zxplore.


That's all folks!

See you on my next blog post where I will be writing about the Files challenge in Fundamentals level. 


Tuesday, May 11, 2021

Updating Sequential files using COBOL

There is no doubt Mainframes running COBOL powers majority of world's business transactions. Some of the firms are Financial institutions, hospitals, government and logistics.    

The very first site that I worked for is (even now) a global leader on the market of business information. They collect, store and process a business's information to generate credit scores and business information reports. The scores assess the business and it helps, say, a bank to use the information in the report when deciding to offer a loan to that business. 

Master file:

    I was part of the application which generated the scores. We stored the scores for ~80 million businesses and we didn't maintain a database. Rather, we used a sequential Master file which was inclined to grow whenever a new business's score was generated. 

In addition to that, it was necessary that we updated the scores of the existing businesses in daily basis as a business is prone to changes (there might be a change in CEO; the business might go Out of Business or Bankrupt; the business might win a Suit; trade payment changes undergone by the business and so on). 

The Master file had a key field (a unique number assigned for each business) which uniquely identified each record. 
All the records were in sequence by the key field. 
The Master file's width (LRECL) was large enough to accomodate every information collected about the business. 
There were coded fields (e.g., codes used for Bankruptcy status, Out of business status etc.) to save space.


Transaction file:

    Daily changes of the business were stored in a file referred to as transaction file. The transaction file had all transactions to be posted to the Master file that have occurred since the previous update. The transaction file also had a key field (the same key as that of the Master file) and all the records in the transaction file were in sequence by the key field.


Updating a Master file:

    The process of making the Master file current is referred to as updating. The Master file is updated via sequential processing by reading in the Master file along with the transaction file and creating a new master file. At the end of the update process, there will be an old master and a new master; should something happen to the new master file, it can be recreated from the old. Refer to the following picture for better clarity.

Click on the image for a larger version.


The Old Master file (OLD-MASTER) contains master information that was complete and current till the previous updating cycle. The transaction file (TRANS-FILE) contains transactions or changes that occurred since the previous updating cycle. These transactions or changes must be incorporated into the master file to make it current and updated. As a result, a New Master file (NEW-MASTER) will include all OLD-MASTER data in addition to the changes stored on the TRANS-FILE that have occurred since the last update. 

As all the records are in sequence by the key field, we compare the key field in the Old Master file to the same key field in the transaction file to determine if the master record is to be updated; this comparison requires both the files to be in sequence by the key field.  

Let's take a look at the format of the two input files:

OLD-MASTER 📂 

(in sequence by M-BUSINESS-NO)

COLS        FIELD

1-9             M-BUSINESS-NO

10-39      M-BUSINESS-NAME

40-42      M-SCORE

43-100       M-FILLER


TRANS-FILE 📂

(in sequence by T-BUSINESS-NO)

COLS        FIELD

1-9             T-BUSINESS-NO

10-39      T-BUSINESS-NAME

40-42      T-SCORE

43-100       T-FILLER


How input transaction and Master records are processed?

Once all the files are opened, a record is read from both the Old Master file and the transaction file. As the files are already in sequence by their respective key fields, a comparison of M-BUSINESS-NO and T-BUSINESS-NO should be made to determine the next set of actions. Three possible conditions are met when comparing M-BUSINESS-NO and T-BUSINESS-NO fields: 

IF T-BUSINESS-NO = M-BUSINESS-NO

If the business numbers are equal, this means that a transaction record exists with the same business number as that on the Master file. When this condition is met, the transaction data is posted to the master record. This means, the record which goes into the New Master file will contain the updated score and other fields from the transaction file.

Once the record is written, the next record is read from both the Old Master file and Transaction file. 

IF T-BUSINESS-NO > M-BUSINESS-NO 

If T-BUSINESS-NO IS > M-BUSINESS-NO, this means that M-BUSINESS-NO < T-BUSINESS-NO. In this case, there is a record in the Master file with a business number less than the business number on the transaction file. Since both the files are in sequence by the business number, this condition means that a master record exists for which there is no corresponding transaction record. This means, the record read from the master file hasn't gone through any changes during the current update cycle and should be written as it is onto the New Master file.

Once write is made to the New Master file, next record is read only from the Old Master File. We do not read another record from the Transaction file as we haven't processed the last transaction record that caused T-BUSINESS-NO to compare greater than M-BUSINESS-NO of the OLD-MASTER.

IF T-BUSINESS-NO < M-BUSINESS-NO

Since both the files are in sequence by business number, this condition would mean that a transaction record exists for which there is no corresponding record in the Master file. This could mean that the scores are generated for a new business (voila! 😃). In this instance, a new master record is created entirely from the transaction file and is written onto the New Master file. 

Once written, the next record is read only from the Transaction file. We do not read another record from the Old Master file since we haven't processed the Master record that compared greater than T-BUSINESS-NO

The following example illustrates the update procedure along with the corresponding action to be taken:


A sample update program is shown below: (Language - COBOL)

  ID DIVISION.                     
  PROGRAM-ID. CBL4.                  
  AUTHOR. SRINIVASAN.                 
 *                           
  ENVIRONMENT DIVISION.                
  INPUT-OUTPUT SECTION.                
  FILE-CONTROL.                    
    SELECT OLD-MASTER ASSIGN TO OLDMAST.       
    SELECT NEW-MASTER ASSIGN TO NEWMAST.       
    SELECT TRANS-FILE ASSIGN TO TRANS.        
 *                           
  DATA DIVISION.                    
  FILE SECTION.                    
  FD OLD-MASTER                    
    RECORDING MODE IS F               
    RECORD CONTAINS 100.               
  01 OLD-MASTER-REC.                  
   05 M-BUSINESS-NO        PIC X(9).     
   05 M-BUSINESS-NAME      PIC X(30).    
   05 M-SCORE              PIC 9(3).     
   05 M-FILLER             PIC X(58).    
  FD TRANS-FILE                    
    RECORDING MODE IS F               
    RECORD CONTAINS 100.               
  01 TRANS-REC.                    
   05 T-BUSINESS-NO        PIC X(9).     
   05 T-BUSINESS-NAME      PIC X(30).    
   05 T-SCORE              PIC 9(3).     
   05 T-FILLER             PIC X(58).    
  FD NEW-MASTER                    
    RECORDING MODE IS F               
    RECORD CONTAINS 100.               
  01 NEW-MASTER-REC.                  
   05 N-BUSINESS-NO        PIC X(9).     
   05 N-BUSINESS-NAME      PIC X(30).  
   05 N-SCORE              PIC 9(3).   
   05 N-FILLER             PIC X(58).  
 *                         
  PROCEDURE DIVISION.               
  100-MAIN-MODULE.                 
      PERFORM 800-INITIALIZATION-RTN        
      PERFORM 600-READ-MASTER           
      PERFORM 700-READ-TRANS            
      PERFORM 200-COMPARE-RTN           
        UNTIL M-BUSINESS-NO = HIGH-VALUES    
          AND T-BUSINESS-NO = HIGH-VALUES    
      PERFORM 900-CLOSE-FILES-RTN         
      STOP RUN.                  
 *                         
  200-COMPARE-RTN.                 
      EVALUATE TRUE                
      WHEN T-BUSINESS-NO = M-BUSINESS-NO      
           PERFORM 300-REGULAR-UPDATE       
      WHEN T-BUSINESS-NO < M-BUSINESS-NO      
           PERFORM 400-NEW-ACCOUNT         
      WHEN OTHER                  
           PERFORM 500-NO-UPDATE          
      END-EVALUATE.                
 *                         
  300-REGULAR-UPDATE.               
      MOVE OLD-MASTER-REC TO NEW-MASTER-REC    
      WRITE NEW-MASTER-REC             
      PERFORM 600-READ-MASTER           
      PERFORM 700-READ-TRANS.           
 *                         
  400-NEW-ACCOUNT.                 
      MOVE SPACES TO NEW-MASTER-REC        
      MOVE T-BUSINESS-NO TO N-BUSINESS-NO     
      MOVE T-BUSINESS-NAME TO N-BUSINESS-NAME   
      MOVE T-SCORE TO N-SCORE            
      MOVE T-FILLER TO N-FILLER           
      WRITE NEW-MASTER-REC              
      PERFORM 700-READ-TRANS.            
 *                          
  500-NO-UPDATE.                   
      WRITE NEW-MASTER-REC FROM OLD-MASTER-REC    
      PERFORM 600-READ-MASTER.            
 *                          
  600-READ-MASTER.                  
      READ OLD-MASTER                
      AT END MOVE HIGH-VALUES TO M-BUSINESS-NO    
      END-READ.                   
 *                          
  700-READ-TRANS.                  
      READ TRANS-FILE                
      AT END MOVE HIGH-VALUES TO T-BUSINESS-NO    
      END-READ.                   
 *                          
  800-INITIALIZATION-RTN.              
      OPEN INPUT OLD-MASTER             
                 TRANS-FILE             
          OUTPUT NEW-MASTER.             
 *                          
  900-CLOSE-FILES-RTN.                
      CLOSE OLD-MASTER                
            TRANS-FILE                
            NEW-MASTER.               
 *                          
Two  files (Old Master file and Transaction file) are passed as input to the COBOL program. The program creates the New Master file as output.  Contents of the files are shown below:

Old Master file:
Contents of Old Master file.


Transaction file:
Contents of Transaction file


JCL used to compile and run the load module:
First step of the JCL compiles the COBOL program. If the compilation is successful, the second step will run to execute the load. 


After submitting the JCL, the following output file is created. 

New Master file:
Contents of New Master file.

Note the new record with business number as 000000004 added to the New Master file. Also, the scores of the existing businesses are updated. 

Use of HIGH-VALUES for End of file conditions:

With 2 input files, it's very unlikely that both the files will reach AT END conditions at the same time. There are high chances that the transaction file will run out of records before the Old Master file. In such cases, the remaining records from the Old Master file must be written to the New Master file. 

The COBOL reserved keyword, HIGH-VALUES is moved to the business number fields when the Old Master file/Transaction file has reached its end. 

HIGH-VALUES refer to the largest value in the system's collating sequence. This is a character consisting of "all bits on" in a single storage position. All bits on in EBCDIC represents a nonstandard, nonprintable character used to specify the highest value in the system's collating sequence. 

When the Transaction file reaches the end, HIGH-VALUES are moved to T-BUSINESS-NO. This ensures that the subsequent attempt to compare the T-BUSINESS-NO and M-BUSINESS-NO will always result in a "greater than" condition i.e., there is a record in the Master file with a business number less than the business number on the transaction file. This means the record read from the master file hasn't gone through any changes during the current update cycle and should be written as it is onto the New Master file.

HIGH-VALUES is a figurative constant that may be used only with fields that are defined as alphanumeric. If numeric fields are used, then moving all 9s (999999999) to the key field will always compare higher than any other number. Beware; if a business number of 999999999 is a possible entry, then moving all 9s during end-of-file condition could produce error. 

We've hit the end-of-file condition for this blog post 😉

    In this post, we learnt about the procedure used for updating sequential files in COBOL. This procedure is also referred to as 'file-matching logic'. Hope it was useful. 

    In the next post, I'll try to implement the same stuff but in Python. Thanks for reading! Should you have any queries/suggestions, please post it in the Comments section below 👍.


References used for this post:
Structured COBOL Programming - 8th Edition - Stern/Stern.


Wednesday, May 5, 2021

Using process statements in SuperCE utility

One of the item that I always strike off ✅ from my checklist whenever I'm assigned with a task of modifying an existing code is Source Code Comparison. It allows me to highlight the difference between different versions of the code. It also acts as a proof for the reviewer that only the intended parts of the code were modified. 

Although, CA Endevor lets us use the Changes (C) option to look at the actual lines we've changed, I rely upon SuperCE utility (option 3.13) to compare the modified code and the existing version of the code in Production environment. 

Welcome to my blog! 😀 In this blog post, we will look at the SuperCE (option 3.13) ISPF option - which is used to compare the content of two datasets - and the usage of Process statements which is similar to the usage of control statements in IBM's DFSORT utility. 

This one is for the Thumbnail 😁

Your time is precious. So, please use the following links to navigate to different sections of this post. 


Intro

SuperC (I guess the suffix 'C' after Super stands for Compare) is the standard option to compare two datasets of unlimited size and record length. SuperCE is the extended version of the standard SuperC Utility and it offers more flexibility like,

  • Comparing the datasets in line, word or byte level, 
  • Supplying process statements for specific compare requirements 
  • Various listing types and so on. 

How to access SuperCE Utility and use it?

To access the SuperCE Utility from ISPF Primary Option Menu, type 3 (Utilities) and press Enter.

Click on the image for a larger version.

ISPF Primary Option Menu.


From the Utility Selection Panel, type 13 (SuperCE)  and press Enter

Selecting SuperCE from Utility Selection Panel.


Voila! 👏
SuperCE Utility Panel.

Alternatively, you can type =3.13 from ISPF Primary Option Menu (or command line for that matter) and hit Enter to directly get into SuperCE Utility panel.
 

How to use SuperCE Utility?

Now that we're inside the SuperCE Utility panel, let's use it. 
The true method of knowledge is experiment. 
 - William Blake
To use SuperCE utility, we should have two datasets. It can be a sequential dataset, PDS or a member inside a PDS. ❗ SuperC and SuperCE doesn't support tape datasets. 

I've got 2 PDS members with a simple COBOL program in each of them. For better understanding, I've named these members as NEW and OLD because the contents in the NEW member is an updated version of contents in OLD member.

The NEW member. This COBOL program accepts a name from the user and displays the name with a greet. 


The OLD member. As you probably know, this COBOL program simply displays a very famous message to the user. 


The next step is to input these datasets in the SuperCE Utility panel and do the comparison. The New DS Name field should be provided with the updated version of the dataset that you want to compare and the Old DS Name field should be provided with the previous version of the dataset. 

Using the SuperCE Utility panel.

Whenever you access the SuperCE Utility panel, it provides default setting for the Compare Type, Listing Type, Listing DSN, and Browse option. 

SuperCE Utility works the best for you with the following settings,
  • Compare Type - Line (Compares the dataset for line differences)
  • Listing Type - Delta (SuperCE provides a listing after the comparison. This listing shows some awesome stats. Delta option lists the differences between the source data sets, followed by the general summary)
  • Listing DSN - This is where the listing output will be stored. SuperCE allocates a default DSN in case if you leave this field blank. If you want to store the results of comparison (I do, as I used to pass on this dataset to my code reviewer), you may provide your own DSN.  
  • Display Output - Yes (This option tells ISPF that you want the output listing to be displayed. If you choose the option No, SuperCE will not show the listing but it shows the result of the comparison (Differences found or No differences found) at the top right corner of the panel). 
  • Output Mode - View or Browse 
  • Execution Mode - Foreground is the default. 
For more details about the SuperCE Panel Fields, click 👉 here.  

Let's hit Enter to allow SuperCE perform the comparison. The listing output after the comparison is shown below.
 
Listing output for Line Compare. 

In the Listing Output Section (Line #4 thru 21), the source lines are shown. 

Left side of each line is either marked with I (Insert) or D (Delete). 

The first source line at line #9, 000200 PROGRAM-ID. NEW.  , is marked with I (Insert) i.e., the listing tells that this line was inserted in the New DSN and wasn't found in the Old DSN. 

The next source line at line #10 is marked with D (Delete) i.e., the listing tells that this line is present in Old DSN but not in the New DSN. So, it must have been deleted in the updated version of the code. 

The Line Compare Summary and Statistics section at the bottom shows the overall summary of the comparison. 

How to use process statements to perform diverse data comparisons?

As you would've noticed in the listing output, the first 6 bytes (Column Numbers) of the COBOL code was also included for the comparison by SuperCE. 

Suppose you want to compare data residing in the columns 7 thru 72 in both the datasets, you should supply process statements for this requirement. 

The process statements panel can be accessed by typing E in the command line of SuperCE Utility panel, or by using Options action bar choice and choosing Option 1 - Edit Statements.

Accessing Process Statements panel.


In the following picture, some examples of the statements that can be used are shown in the bottom half of the screen. The actual statements required for your comparison should be typed in the EDIT window shown in the first half of the screen. 

Process Statements panel.


CMPCOLM process statement should be used to compare using a column range.

Inputting Process Statements. 

We can exit the screen now by pressing F3. A message, 'Statements DS saved' is displayed at the top right corner of the SuperCE Utility panel. 

Statements DS Saved.


The compare statements will be stored in the dataset provided in Statements DSN field in SuperCE Utility panel. This field can also be left blank allowing the system to create one dataset for you to store the process statements. 

On hitting Enter, the compare request will be invoked with the process options.
 
Listing Output

The Line Compare Summary shows that there are 4 line matches and 6 differences. At the bottom of the screen, the criteria used for this compare task is specified. 

There are many flavours of process statements that can be invoked depending on what you need to compare. Some of them are listed below. 

Example 1:


You can notice that the end of the process statement, CMPCOLM, contains a suffix of N and O, indicating that it is referencing the New DSN and Old DSN respectively. What follows the statement is the column range within the referenced dataset. 

With these statements, we tell SuperCE that we want to compare the data residing in columns 5 to 30 in the New DSN with data in columns 1 to 25 in the Old DSN. 

Example 2:
Suppose you want to ignore the comment lines in your COBOL code from being compared. 


DPLINE (Do not process lines) process statement do not process the lines that can be recognized by a unique character string, for comparison. 

DPLINE '*',7 scans for an asterisk ('*') in column 7 and ignores it from being compared.


Example 3:
Suppose if you want to compare only specific rows in each datasets.


The NFOCUS and OFOCUS process statements can be used to specify the rows to be used for the comparison. In this case, rows 1 thru 10 will be used from the New DSN while rows 11 thru 21 will be used from the Old DSN. 

More about Process Statements can be found 👉 here

Running SuperCE in batch mode

Sit back and relax. You can create a JCL from SuperCE Utility panel (with fewer hits on that Enter button) to run the comparison in batch mode. ISRSUPC is the program which is used for comparison.

After providing the datasets in the New and Old DSN, select the execution mode as Batch and press Enter. In the Submit Batch jobs panel, Job statement info is provided at the bottom of the screen. I've chose to Edit JCL before submit. 

SuperC Utility - Submit Batch jobs panel.


Upon hitting Enter, the JCL is shown to user. 


If you are adding Process Statements, a SYSIN DD statement will be added to the JCL. 


Conclusion

Hope you witnessed the uses of SuperCE utility. If SuperCE stands for Super Compare Extended, then adjective Super is well suited and appropriate. Should you have any questions/suggestions please leave it in the comments section below. Thx 👍


References: 
  • z/OS ISPF User's Guide Vol II
  • TSO/ISPF Curriculum z/OS v2.3 - Interskill Learning